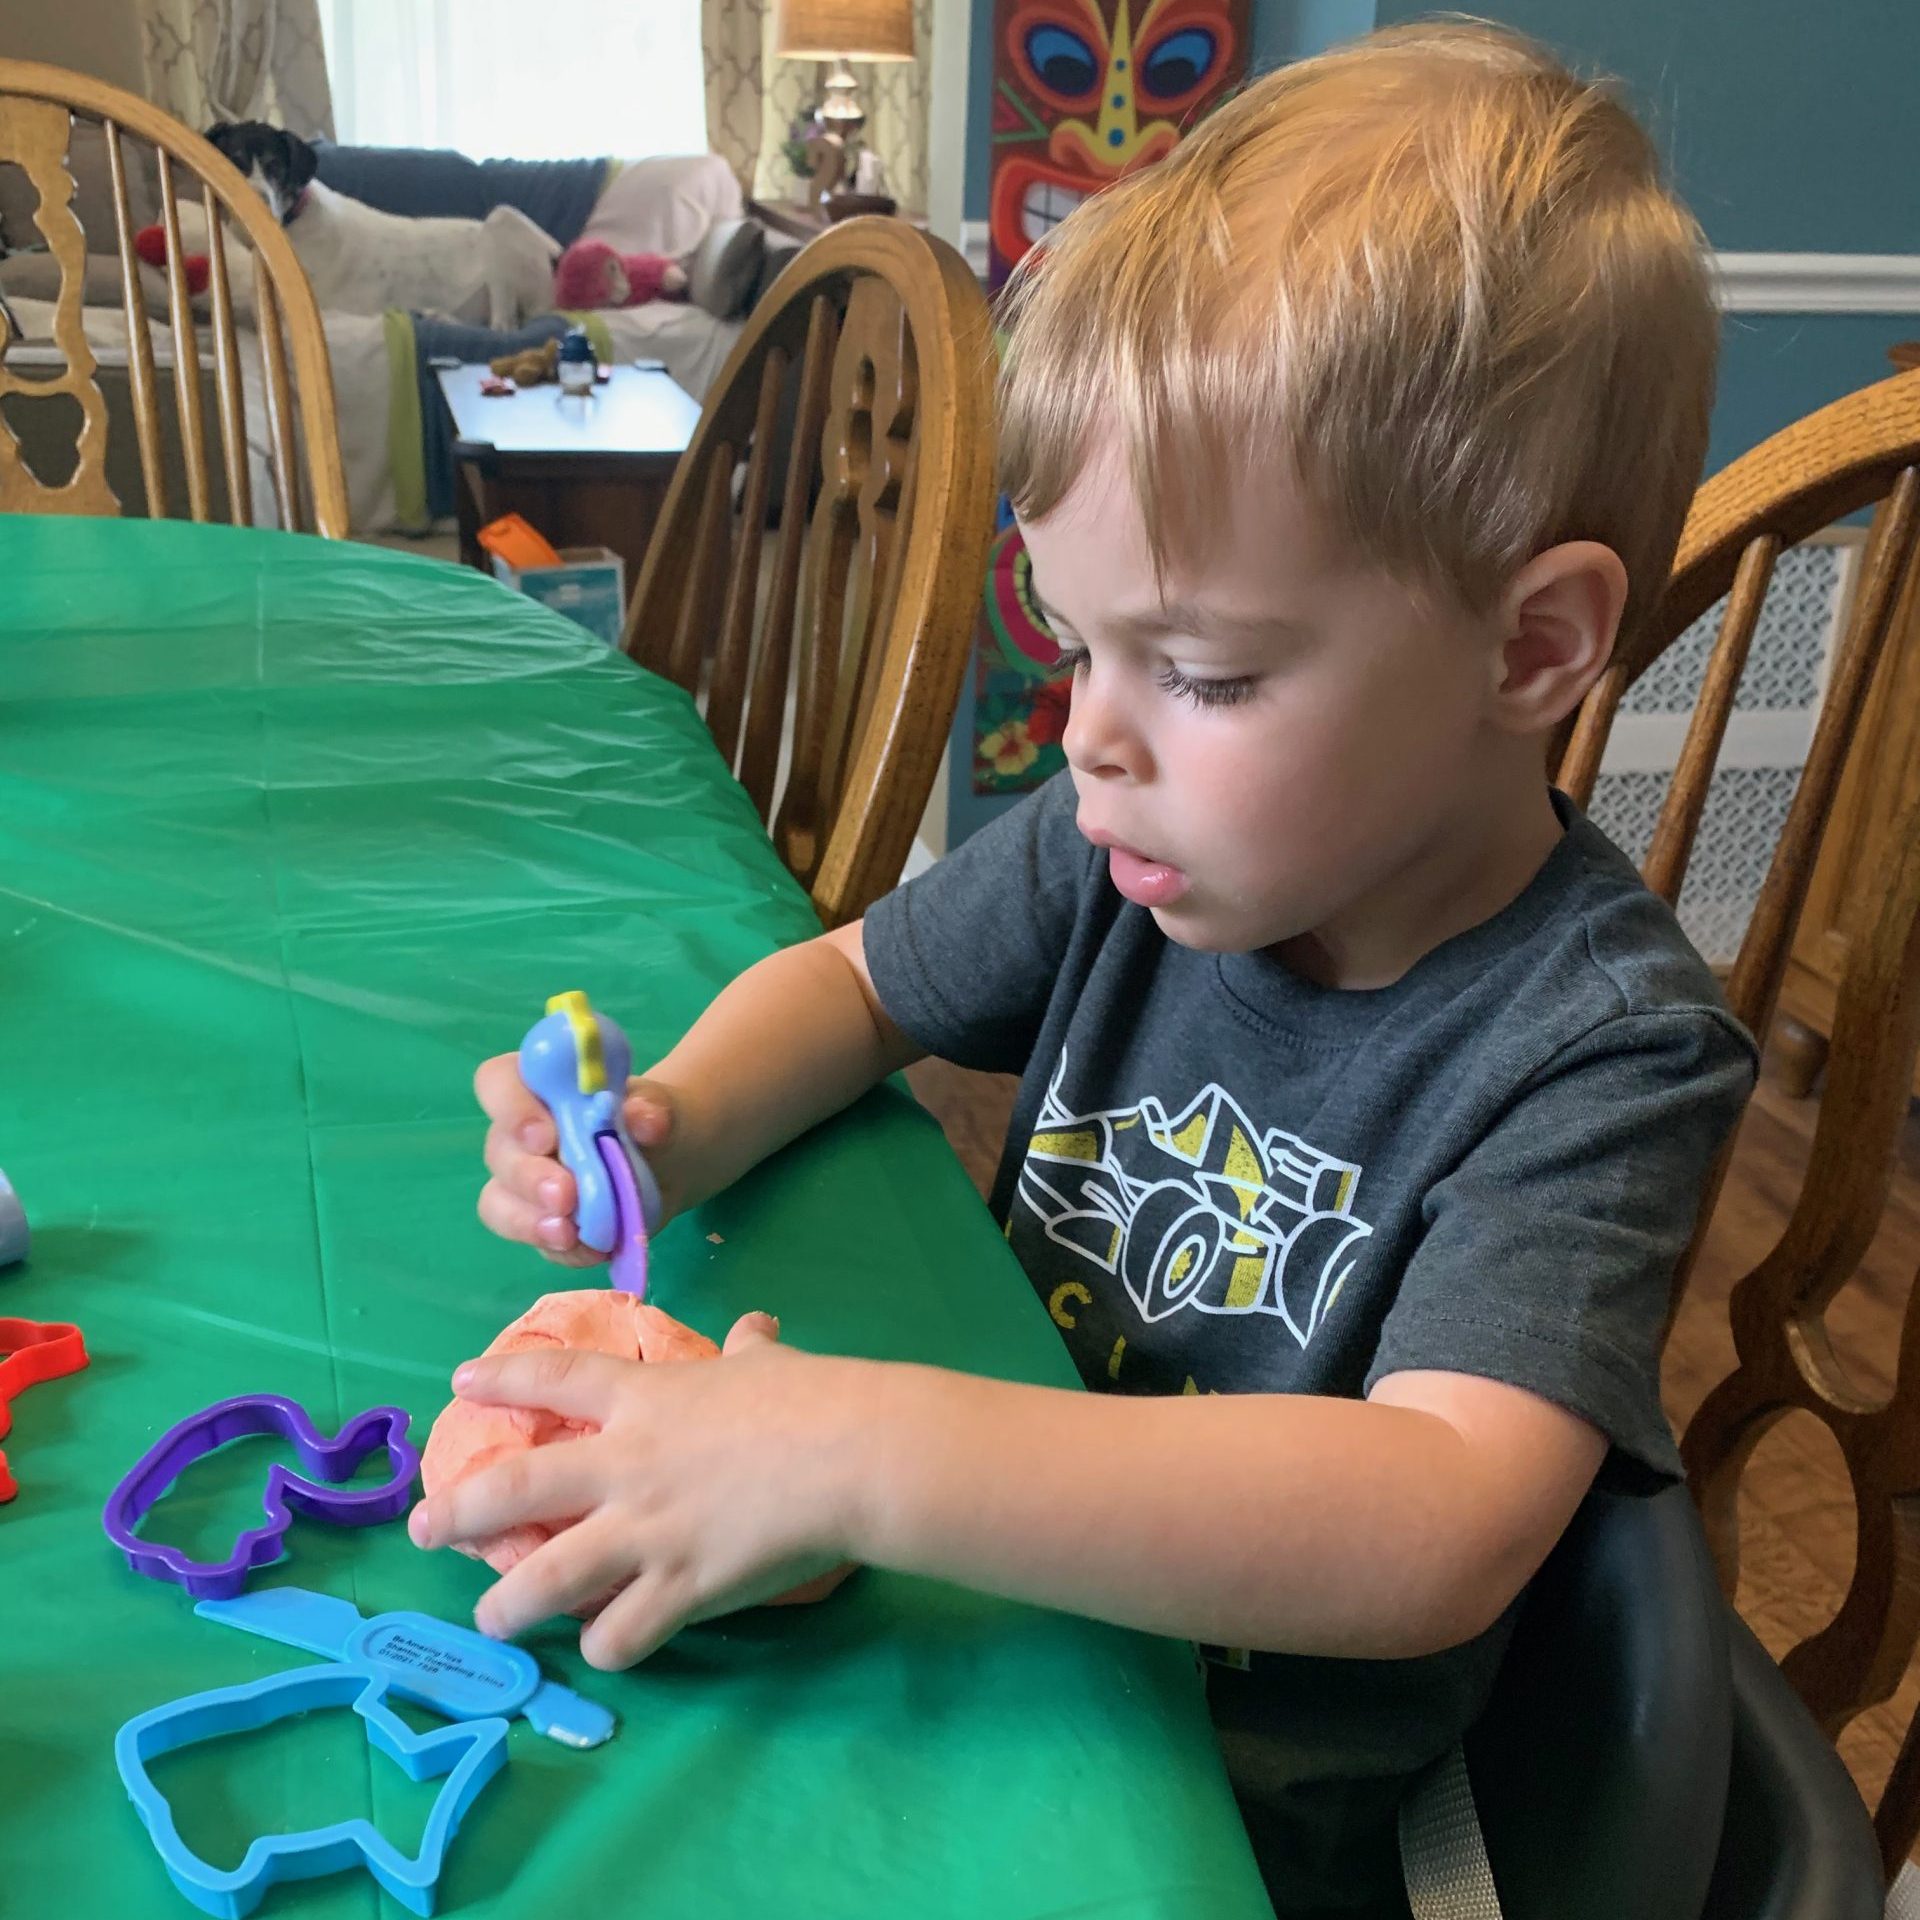
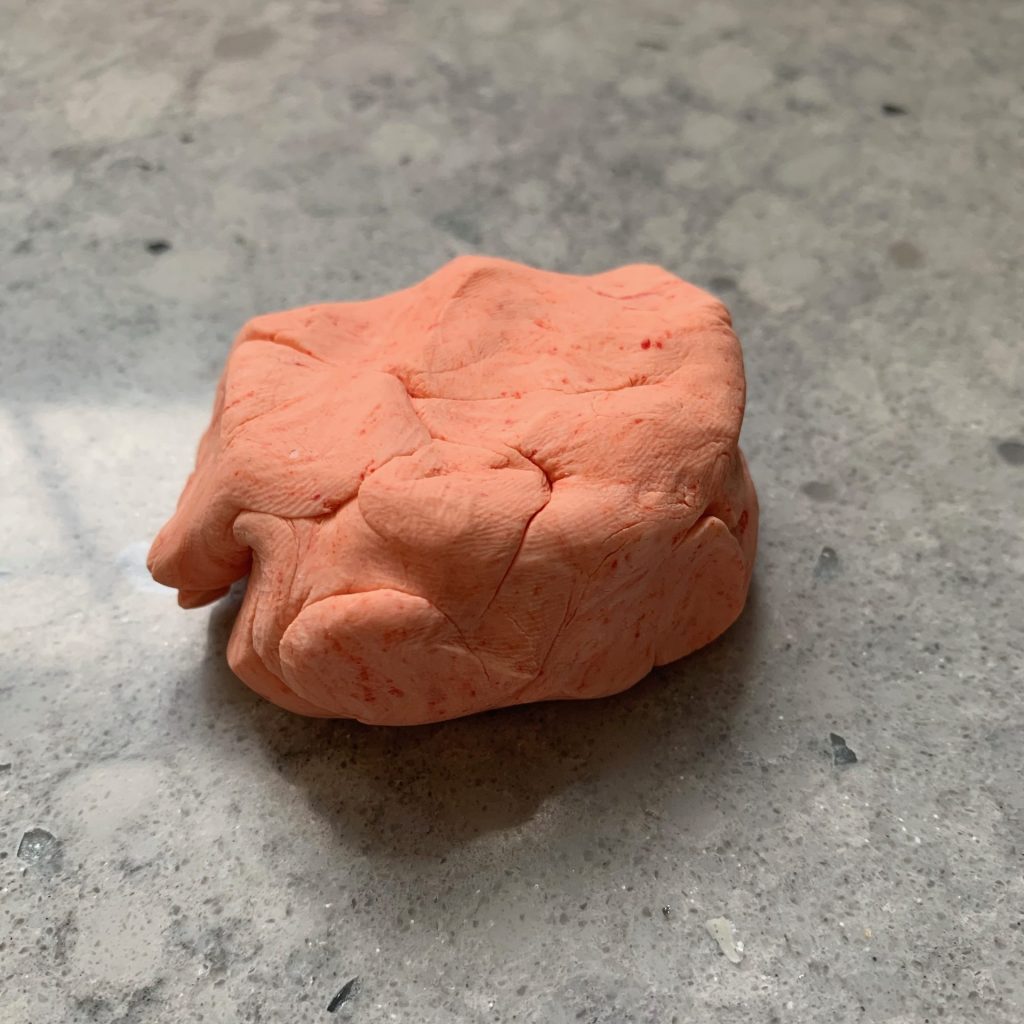
If you’re tired of play-doh, but not up for slime, try making moon dough. It’s more malleable than play-doh, but not quite as sticky as slime. And conditioner is one of the main ingredients, making it easy to wash out of your kid’s hair. This moon dough activity is a great way to spend an hour or two with your little one.
Moon Dough
On the spectrum of squishy things to play with, moon dough falls between play-doh and slime. It’s softer and more malleable than play-doh, but not as goopy as slime. It’s a fun and easy rainy day activity to pull out when you’ve been stuck inside a while.
The perks of making moon dough is that it’s easy (3 ingredients + optional glitter), it smells nice, and you can easily take things up a notch by adding glitter. The downfalls of moon dough is that it’s decently sticky. It stuck to the table cloth, our play-doh cookie cutters and all over my son’s hair.
The moon dough washed off the cookie cutters pretty easily. I was able to comb most of the dough out of my little guy’s hair. The rest washed out in the shower (one of the perks of having conditioner as a main ingredient).
Moon Dough Recipe
1/2 cup conditioner 1 cup corn starch Food coloring Glitter (optional)
Mix together conditioner, corn starch, food coloring, and glitter (if desired) in large bowl using a wooden spoon. Once mostly mixed together, knead together mixture into a big ball.
Overall, moon dough is a fun activity to try on a rainy day or if you’re looking to take a break from plah-doh, but it’s not an every day activity.
Fun with Moon Dough
5 Activities When Your Kid is Home Sick
It stinks seeing your kid sick and miserable. And if you’re anything like our family, your kid has been home sick and miserable a lot this year. So I put together 5 easy, low-key activities to do with your kids when they’re on the mend, but not ready to go back to school.
5 Activities When Your Kid is Home Sick
[ONE] Make a book
Coloring is a pretty low-key activity to do when your kiddo is feeling under the weather. Make it special by turning all their artwork into a book. Have your little artist make a special cover, then hole punch the side and tie string to create a book bind.
Making a book
[TWO] Do a Drive-In Movie – in the Living Room
This is one of my favorite “mom hacks”. Turn watching a ton of tv into an activity by setting up a “drive-in movie”. Use a box to make a “car” – and and if your kid is up for a low-key activity, have them help decorate. For a non-crafty version, bring the cozy coup (or similar vehicle toy) inside for the day. Or heck, you could even use a laundry basket with a few pillows to make it comfy. Then you’re ready for your drive-in movie marathon.
Drive-In Living Room Movie
[THREE] Have a fun bath
Spending time in a steamy bathroom is generally good for a snotty nose. Make it fun by adding in glow sticks, pom poms, plastic block toys (like LEGO Duplos), or even a popsicle. And no need to wait until bedtime – you can do a fun bath at any time of day.
[FOUR] Build a block city
You know when you get to the point where you’ve been home a few days and all the toys have been pulled out? This is the activity for then. Grab your roads rug or make roadways by drawing on a flattened box. Then use blocks, LEGOS, Magnatiles, and whatever else is already scattered around your house to erect buildings for your city.
Building a block city
[FIVE] Easy sensory bin
I love an easy sensory bin because it’s great to be able to pull out our bin for something simple to do to pass the time. It’s also a simple activity to put on the floor that requires little energy but is still interesting and engaging. If you need ideas, I’ve got a whole list of easy sensory bins that typically take less than 10 minutes to setup and can easily be stored away.
Easy sensory bin
If you enjoyed this post, don’t miss our other fun at-home activities! And make sure to follow One Little Small on Pinterest for even more great ideas.
St Patrick’s Day Sensory Bin
Looking for an activity to keep your little leprechauns busy and out of trouble? Well, you’re in luck! This St. Patrick’s Day Sensory Bin is easy to setup and will keep your littles entertained all March long.
And the best part? Most of the items for this sensory bin can be purchased at your local grocery or dollar store. But if you’d rather have it all shipped to your doorstep, check out the shopping links below.
St. Patrick’s Day Sensory Bin
Here’s what you’ll need for the St. Patrick’s Day Sensory Bin:
I love an easy, holiday-themed sensory bin, and our St. Patrick’s Day Sensory Bin is one of my favorites. For this bin, I use dried green split peas as the fill, and throw in some St. Patrick’s Day decorations and rainbow-colored trinkets. The best part about using the green peas as the fill is that it easily transitions to a spring or Easter-themed sensory bin after St. Patty’s Day.
Our St. Patrick’s Day Sensory Bin
St. Patrick’s Day Bin Supplies Shopping Links
Disclosure: One Little Small is a participant in the Amazon Services LLC Associates Program, an affiliate advertising program. The links in this post are affiliate links, meaning if you go through them to make a purchase I will earn a small commission. I selected the products in this guide because of their quality and not because of the commission I receive from your purchases. The decision is yours, and whether or not you decide to buy something is completely up to you.
You can pick up most of the supplies needed to make this sensory bin at the grocery store. But if you’d rather have everything arrive at your doorstep, you can use the shopping links below. I selected these items based on their similarity to the items I own and used for this sensory bin.
IRIS USA Storage 28 Quart Non-Latching Box
Sensory Bin Container
A shallow, clear plastic container with a lid has worked best for our family when it comes to sensory bins. This IRIS USA Storage 28 Qt Box is similar to the container we use at home at an affordable price. Having a lid is great – just pop it on for easy clean up.
A bag or 2 of dry green split peas makes for the perfect fill for this St. Patrick’s Day sensory bin – in fact we usually keep it around through the en d of spring.
I’m always looking for cool, affordable tools to add to our sensory bin. I like how these scissor tongs add a dash of color and also help kids practice fine motor skills.
I like to add themed cups or containers to our sensory bins, and I love this rainbow set. We keep these cups with our every day play items and use them frequently. Overall they’ve held up nicely, and are available at a price where you don’t feel too upset when you need to replace a crushed cup.
This fun St. Patrick’s Day decorations set includes mini cauldrons, clover gold coins, and shamrock confetti. All things guaranteed to take this sensory bin up a notch!
Another cool container option is this 8″ green cauldron. I love how the green cauldron is a different size and color from what you would typically expect in a St. Patrick’s Day sensory bin.
Fovths St. Patrick ‘s Day Fabric Shamrock Ornaments, 30 pcs
Fabric Shamrocks
No St. Patrick’s Day sensory bin would be complete without shamrocks! I really like how this set of shamrock ornaments is made from fabric and not covered in glitter.
If you don’t already have a bunch of pom poms all over your house (and under your couch), pick up this 300 piece set of rainbow pom poms. It’s the perfect addition to your St. Patrick’s Day sensory bin. And something your kids will use all the time (guaranteed!)
Looking to spend some koala-ty time doing activities with your kids? Here are 5 easy Valentine’s Day themed activities and crafts to do with your little ones this month. Valentine’s Day puns not included (for the most part).
5 Easy Valentine’s Day Activities
[ONE] Valentine’s Day Sensory Bin
An easy, festive activity that can be used all month long is a Valentine’s Day Sensory Bin. For our V-Day sensory bin, I dyed rice red and pink, and added in assorted (durable) heart decorations. We keep our sensory bin in a container with a lid, making it super easy to pull out and enjoy any time.
Our Valentine’s Day sensory bin
[TWO] Toilet Paper Tube Heart Painting
This is the perfect activity for a kid who loves to paint. Here’s what to do: Take an empty toilet paper roll tube. Bend one side down into a point and the opposite side inwards to form a heart. It may help to tape around the circumference of the tube to keep the heart shape.
Pour a palette of Valentine’s Day colors onto a paper plate, give the kiddos a canvas (construction paper), and let them stamp hearts using one end of the TP roll. Soon you’ll have a beautiful masterpiece!
[THREE] Heart Mosaic Craft
I loved this craft for when Ben was a toddler. It was a super easy way to make pretty valentines for our families. And it was a lot less messy than using paint.
Here’s what to do: Cut out hearts from white or light-colored construction paper. Then cut out small pieces of red, pink, and purple tissue paper. Pour some glue or mod podge onto a paper plate. Finally, use a sponge brush to paint the hearts and put the tissue paper onto the heart. You can also use a glue stick depending on your child’s age.
Let the hearts dry overnight before sending them out as valentines – or use as decorations to hang up around the house.
Making heart mosaics
[FOUR] Love Monsters
One craft we’ve had fun making this year is TP Roll Monsters. So much so that we made TP Roll Monsters on Halloween, and then made Monster Turkeys out of paper plates and TP roll tubes on Thanksgiving. Carrying the tradition through, it only makes sense to make Love Monsters out of our stock of empty toilet paper tubes. However, you can easily modify this craft to make “love bugs” instead of monsters, if that’s more your jam.
Here’s what you’ll need: a few empty toilet paper rolls, a variety of age-appropriate art supplies (such as markers, crayons, etc), an assortment of stick-on or glue on decorations (stickers, adhesive gems, small heart shapes, etc.), and googly eyes. Trust me on the googly eyes – it makes the end result so much more fun (and funny).
Then let your kiddos go to town! There’s no right way for a love monster to look, so this is a perfect craft for creative kids!
Our family of love monsters
[FIVE] Make Valentines
This make seem like an obvious choice, but I’ve found that family and neighbors love receiving a Valentine in the mail from my little one – no matter how old he is.
When Ben was a baby, I traced his hand and glued it on top of a heart and then onto card stock. Other years we made a heart mosaic or just colored a heart that I later glued onto a card. The younger they are, the simpler the craft should be.
Now that he is a bit older and actually enjoys spending time making valentines, I will pick up a DIY valentines kit from the store with everything we need. That way I can enjoy making one too – instead of being focused on set-up and clean up.
Making valentines
I hope you liked these easy Valentine’s Day activities a whole guac! Happy Valentine’s Day, friends!
Enjoying our Valentine’s Day sensory bin
If you enjoyed this post, don’t miss our other fun at-home activities! And make sure to follow One Little Small on Pinterest for even more great ideas.
How to Dye Rice
The easiest way to customize a sensory bin
For our Valentine’s Day sensory bin, I decided to try something new for the fill – dyeing rice. I had avoided making anything so complicated for our seasonal sensory bins, but I really wanted a red and pink fill for this festive sensory bin.
Overall, it took less than an hour to dye the rice and was easier than I anticipated. And everything you need to make this sensory bin fill can be picked up during your regular grocery store trip.
How to Dye Rice
Here’s what you’ll need
Uncooked white rice
Vinegar
Food coloring
Gallon size zip bag (1 bag per color)
Measuring cups
Large pan or container for drying rice
Plastic fork
Steps
Pour desired amount of rice into bag
Add vinegar into the bag – 1 tbsp of vinegar per 1 cup of rice
Add several drops of food coloring into the bag. The more food coloring, the more saturated the hue the rice will be.
Zip bag closed and shake rice around until fully coated with food coloring. It took me a few minutes of shaking and mashing the rice around to evenly coat. Add additional drops of food coloring as needed for desired color.
Pour rice onto pan or container to dry. Use plastic fork to loosen any clumps.
Repeat for each color.
Optional: Occasionally stir rice around on pan to ensure even drying
Letting the rice dry after dyeing
Tips
Keep a Dustbuster handy for rice spills.
If dyeing a large amount of rice, it may be easier to split into smaller groups. For example, I dyed 4 cups of rice in each color. I found it easier to dye 2 groups with 2 cups of rice than one group of 4 cups of rice.
You can use any kind of uncooked white rice, but I noticed that the instant rice had the tendency to clump.
It took a few minutes to fully coat the rice in food coloring once I added all the ingredients. And I did have to add quite a bit of red dye for the right hue.
Dyeing rice for a sensory bin is a great way to add some festive color to play time. It took less than an hour and used supplies we could easily pick up at the grocery store. It was definitely worth the time that it took to make!
Our Valentine’s Day sensory bin
If you enjoyed this post, make sure to check out our other sensory bin activities. And make sure to follow One Little Small Blog on Pinterest for even more great ideas!
Snow Painting Sensory Bin
How to enjoy a snow day, but still stay inside
I love snow days. There’s nothing more fun than bundling and playing outside in a winter wonderland with my kiddo and dog. But I can only really handle 2 or 3 days of snow before I begin to dread the bundling and unbundling process.
Insert snow painting sensory bin. I put some snow in our sensory bin, added some paint supplies and colored water, and voila! We had fun playing in the snow without the hassle of dressing everyone up in layers of clothing to go outside.
Snow Painting Sensory Bin
Here’s what you’ll need
Large, shallow container
Fresh snow
Paint containers
Smaller containers and scoops
Colored water (water + food coloring or washable paint)
Paint brushes
Droppers
The supplies
The Setup
For this snow painting activity, I pulled out our trusty 28qt plastic container. Before I filled the container with snow, I laid down a bunch of old towels to cover our kitchen floor. This activity can get a bit messy, so it’s best to cover your floors prior to bringing any snow inside.
Next, set up the “painting” supplies. Take paint containers (or other containers you don’t mind getting messy) and fill with water. Then add a few drops of food coloring or washable paint in each cup. Stir until mixed.
Finish the setup by laying out your paint, paint brushes, droppers, smaller containers and scoops. Lastly, take your big sensory bin outside and fill with fresh snow.
Now you’re ready to have SNOW much fun painting a frozen masterpiece!
Setting up a Snow Painting Sensory Bin is an easy way to enjoy the flurries without the hassle of getting everyone ready to go outside. It’s the perfect snow day activity for toddlers and preschoolers alike!
If you enjoyed this post, make sure to check out more at-home activities! And make sure to follow One Little Small Blog on Pinterest for even more great ideas!
5 Easy Thanksgiving Activities
Looking to gobble up some fun? Here are 5 easy Thanksgiving turkey-themed activities and crafts to do with your little ones this Thanksgiving.
5 Easy Thanksgiving Activities
[ONE] Paper Plate Turkey
Monster Paper Plate Turkey
The Paper Plate Turkey is a fun activity for creative kiddos, and can be used as Thanksgiving decor once it’s complete. For this activity, you’ll need a white paper plate, toilet paper roll tube, glue, art supplies (markers, crayons, paint, etc.), and various decorative craft supplies – such as feathers, pom poms, stickers, googly eyes, and more.
Cut the paper plate in half, and let your child go to town decorating the turkey’s body (toilet paper roll tube) and fan (the paper plate). Once their masterpiece is complete, glue the TP roll to the paper plate. Let dry before displaying.
[TWO] Pumpkin Turkey
Pumpkin Turkey
Have any pumpkins leftover from Halloween? Put them to use with this Pumpkin Turkey activity. For this activity you will need a pumpkin, hammer (we used a plastic toy hammer), golf tees, and art supplies to create a turkey face.
We started by using paint markers to create a turkey face on our pumpkin (the one pictured is a turkey monster pumpkin). Once the face was dry, we created the turkey’s fan by using colored golf tees and hammering them into the back. It does take a certain amount of strength to hammer the golf tees in so that they stay in the pumpkin, so this activity is probably best for ages 3 and up.
For a pumpkin-free version of this activity, use a large ball of play-doh similar dough.
[THREE] Color Match Turkey
Color Match Turkey
There are so many ways to do this activity. The main focus is to match some sort of item or medium to different colored turkey feathers.
I chose to setup our color match turkey activity to focus on cutting and glueing skills. I started by drawing a turkey on a large piece of paper. Next, I drew feathers, outlining each with a different color marker. Last, I gathered scrap paper in all the different colors of the feathers.
To make the turkey come to life, my son cut up the paper into smaller pieces, then glued the pieces to each corresponding feather.
Thankful Turkey Supplies
[FOUR] Nature Turkey
Nature Turkey
Take all those pinecones and leaves that your kiddo insists on keeping in your home and turn it all into a Nature Turkey. For this activity you’ll need a pinecone, a variety of leaves in different sizes, play-doh, piece of cardboard or paper plate, and a turkey face.
To create the turkey’s body, I used play-doh to stick the pinecone upright on a piece of cardboard. You can also use a paper plate or other surface you don’t mind getting play-doh on. I created a simple turkey face with some scrap paper from the Color Match Turkey activity and more play-doh to stick that onto the pinecone.
To create the turkey’s fan, have your child stick the leaves in the back of the pinecone. This is MUCH harder than it sounds! If anyone starts to get frustrated, put more play-doh on the back of the turkey, and then stick the leaves to the play-doh.
[FIVE] Thankful Turkey
Thankful Turkey
I love the idea of creating a Thankful Turkey every year. It’s a great opportunity to teach young children about the concept of being thankful. I started this tradition with my son when he was 3 years old.
To create our thankful turkey, I used two different sized mixing bowls and traced 2 circles on a large piece of brown construction paper. Next, I cut out the two circles, along with feathers I traced on pieces of different colored construction paper. I glued the turkey’s body onto a large piece of construction paper and decorated the turkey’s face and legs.
To create the turkey’s fan, add a feather with one thing your child is thankful for throughout November.
Thankful Turkey
Thankful Turkey Supplies
Thankful Turkey
I hope you have fun doing these turkey-themed activities with your little turkeys this Thanksgiving.
If you enjoyed this post, don’t miss our other fun at-home activities! And make sure to follow One Little Small on Pinterest for even more great ideas.
5 Easy Halloween Activities
Bummed about this lovely, rainy October weather? Here are 5 easy Halloween activities to keep your toddler or preschooler entertained at home.
5 Easy Halloween Activities
[ONE] Halloween Bubble Foam
Halloween Bubble Foam
Break out your sensory bin and body wash for this sudsy fun activity. Bubble foam is an easy activity to whip up, and becomes a Halloween activity by adding food coloring and spooky trinkets. For this activity you’ll need:
Mixer (stand or hand held)
2 cups of water
1/2 cup of body wash
Food coloring
Combine water, body wash (any brand), and food coloring (4 drops of yellow and 2 drops of red to make orange) in bowl. Mix on HIGH until enough foam is made to fill your container. Pour foam into sensory bin or large, shallow container. Add in smaller sized containers and scoops, paint brushes and a whisk. Top off with spooky Halloween trinkets such as eyeballs and spider rings.
[TWO] Toilet Paper Tube Monsters
TP Roll Monsters
You really can’t go wrong with this activity. Grab a few empty toilet paper rolls, a variety of age-appropriate art supplies, and presto – you’re ready to create your own hoard of monsters.
When making TP monsters with my four year old, we used markers, colored pencils, Halloween foam shapes, glue, and googly eyes. The googly eyes were a huge hit during this activity, but really, any art supplies you have around the house will work.
TP Roll Monsters
[THREE] Glow Stick Bath
Glow sticks are an easy way to jazz up bath time. This time of year you can find glow sticks by the Halloween candy or the party supplies at your local grocery store. Just crack 2 or 3 glow sticks, toss them in the tub, and turn off the lights for some spooky splish splash fun.
And it doesn’t have to be pitch black in the room for a glow stick bath to be fun! Just dim the lights slightly for a mid-day bath.
[FOUR] Popsicle Sticks Spider Web
Popsicle Stick Spider Web
This Halloween activity is best for slightly older kids or adults – as I enjoyed making a popsicle sticks spider web, but my son did not. For this activity, you’ll need:
3 popsicle sticks
Glue
Yarn
A decorative spider or spider ring
Arrange the 3 popsicle sticks in an asterisk* shape. Glue together in the center of each stick. Once dried, cut a long piece of yarn and tie to one stick towards the center of the asterisk. Begin weaving the yarn around the shape, looping the string once or twice around each stick. To finish, tie off the end of the web, and welcome your little spider friend to their new home.
[FIVE] Halloween Sensory Bin
Halloween Sensory Bin
This easy Halloween sensory bin takes about 10 minutes to put together and can be used all month long. You’ll need a large container, red lentils, smaller containers & scoops, and some spooky trinkets. You can check out all the details – including shopping links, through the button below.
Rainy days are no fun when you’re trying to squeeze in all that outdoor Halloween fun. But these spooky activities can help make the days stuck indoors a bit less gloomy.
Halloween Sensory Bin
Looking for an easy Halloween activity? Look no further than this Halloween Sensory Bin! This sensory bin is easy to put together and will keep your kiddos entertained for hours.
Most of the items for this sensory bin can be purchased at your local grocery or dollar store. But if you’d rather have it all shipped to your doorstep, check out the shopping links below.
Halloween Sensory Bin
Here’s what you’ll need for the Halloween Sensory Bin:
Large, shallow container
Fill (such as red lentils or dyed orange rice)
Assorted containers and scoops
Halloween / spooky items
Enjoying the Halloween Sensory Bin
The Setup
For our family, I’ve found that the best easy sensory bins have four key elements: a big container with lid (for easy storage), fill (such as beans, dyed rice, water, bubbles, etc.), a variety of smaller scoops and container, and themed-trinkets.
For the Halloween Sensory Bin, I used my large, 28QT container as the base container. This container is great for sensory bins as it is large, but still shallow enough for little ones to use – plus it has a lid for easy storage.
Inside the bin, I used dried red lentils for the fill. Despite the name, red lentils are the perfect orange color for a spooky sensory bin. You could also use orange dyed rice for the fill.
For the smaller containers, I included some Halloween-themed items, such as a witch’s hat, mini pumpkin pail and black cat cup. Lastly, I threw in some spooky trinkets, such a spider rings, plastic bats and rats, eyeballs.
Halloween Sensory Bin
Halloween Sensory Bin Supplies Shopping Links
Disclosure: One Little Small is a participant in the Amazon Services LLC Associates Program, an affiliate advertising program. The links in this post are affiliate links, meaning if you go through them to make a purchase I will earn a small commission. I selected the products in this guide because of their quality and not because of the commission I receive from your purchases. The decision is yours, and whether or not you decide to buy something is completely up to you.
You can pick up most of the supplies needed to make this Halloween sensory bin. But if you’d rather have everything arrive at your doorstep, you can use the shopping links below. I selected these items based on their similarity to the items I own and used for this sensory bin.
Sterilite 28QT Storage Box
Sensory Bin Container
A shallow, clear plastic container with a lid has worked best for our family when it comes to sensory bins. The Sterilite 28QT Storage Box is similar to the container we use at home. Having a lid is great – just pop it on for easy clean up.
A bag of red lentils makes for the perfect fill for this Halloween sensory bin. Alternatively, you could take white rice and use food coloring to dye it to orange perfection.
These plastic tongs are easy for little hands to grasp and helps them develop fine motor skills. Plus, the tongs are a fun tool to use in any sensory bin.
Another way to amp up the fun with sensory bins is to add different types of scoops. These plastic scoops are easy for little hands to maneuver, but are different enough to pique their interest.
These cute little cauldrons make for a fun container for this spooky sensory bin. Plus they can double for a pot of gold for a St. Patrick’s Day bin in springtime.
Another cute container option for this sensory bin are these little pumpkin pails. And there are so many fun ways to reuse these little pails when you’re done with this activity.
And that’s it – a simple setup for a sensory bin you can use all spooky-season long. You really can’t go wrong when it comes to creating a Halloween Sensory Bin for your kiddos. Just follow these steps for creating an awesome bin.
Toilet Paper Roll Fireworks Painting
What’s more festive for the Fourth of July than fireworks? Here’s an activity to create some patriotic artwork with your little one this Independence Day.
Toilet Paper Roll Fireworks Painting
Supplies
2-3 Empty Toilet Paper Roll Tubes
Red, White, and/or Blue paint
Paper plate (to put paint on)
Scissors
Steps
Make the firework stamps from the toilet paper roll tubes. Take toilet paper roll tube and cut about a third of the way up. Repeat, cutting strips all the way around the circumference of the roll. The strips can be as thick or thin as you’d like!
TP Roll with strips cut
Fan the pieces out from the center of the roll, creating the firework shape.
TP Roll ready for painting
Repeat for each roll. 2-3 rolls are ideal to create a variety of fireworks.
Squirt paint on to paint, tray or anything with a flat surface. Add glitter and mix into paint for some extra pizzazz.
Paint + Glitter
Then let the kiddos paint their little hearts out.
TP Roll Fireworks Painting
This activity can also easily be modified to make spiders, suns, flowers, stars and more!